Modifying a Poppery Popcorn
Popper to Roast Coffee
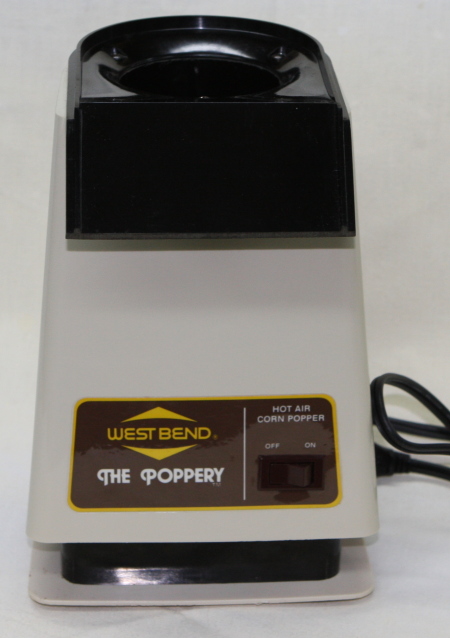
This project was the modification of a West Bend Poppery model 5459
popcorn
popper to use as a coffee roaster. This is the "original" 1500 watt
unit, not the
newer "Poppery II" unit. That newer version is lower powered and much
lighter
weight. The modification made was to add a second power cord such
that one
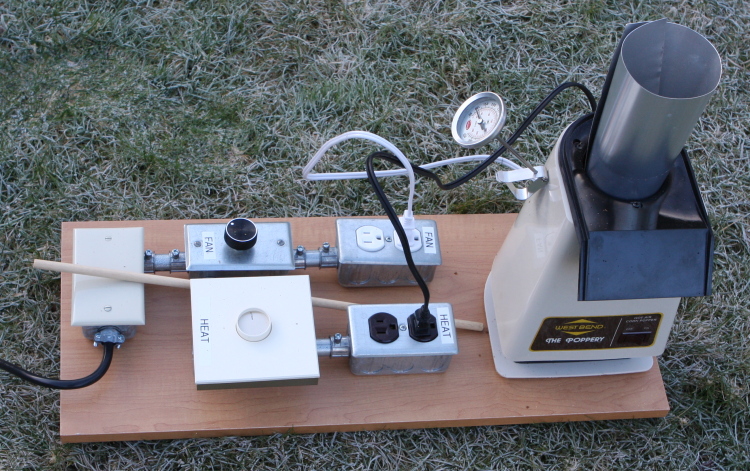
cord powers the heating element and the second cord powers the fan. The
modified
unit then plugs into this
controller board.
Here is the popcorn popper I used:
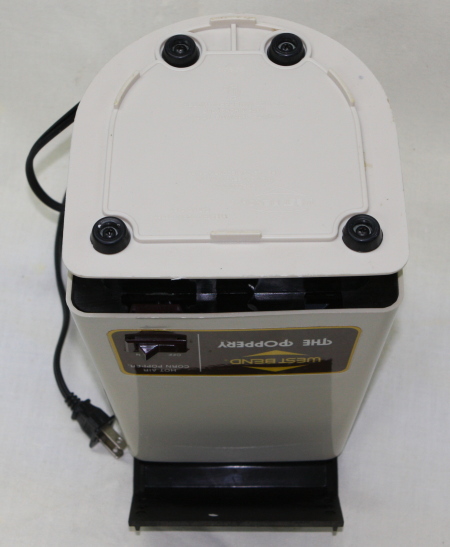
This is the view from the bottom. First step is to remove the 4 screws
in the center of the
rubber feet.
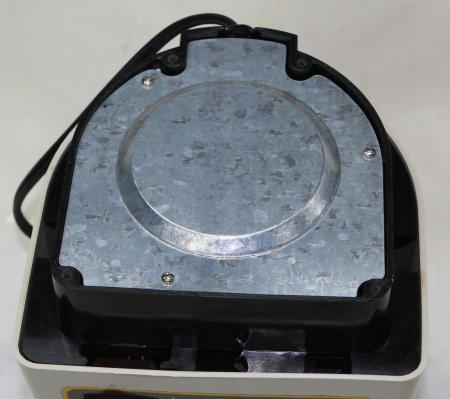
With those screws removed you reveal an inner metal plate that covers
the motor and wiring.
Remove the three metal screws securing this metal plate.
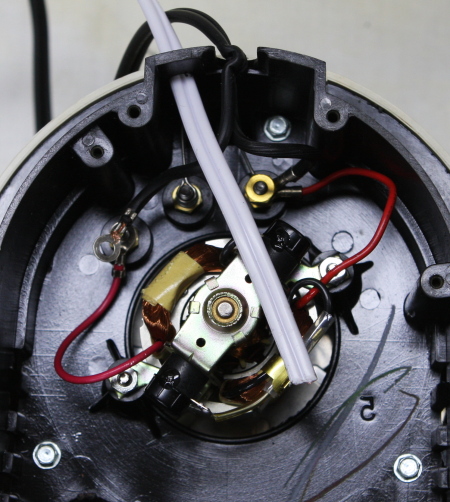
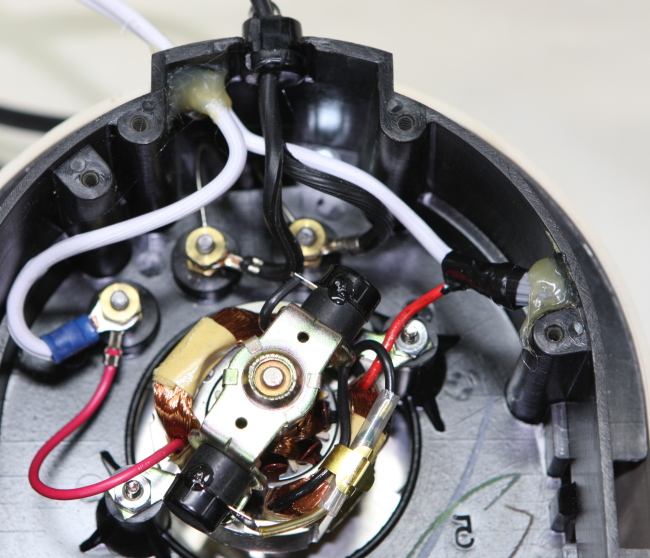
With the metal plate removed you will see the fan motor and wiring like
so:
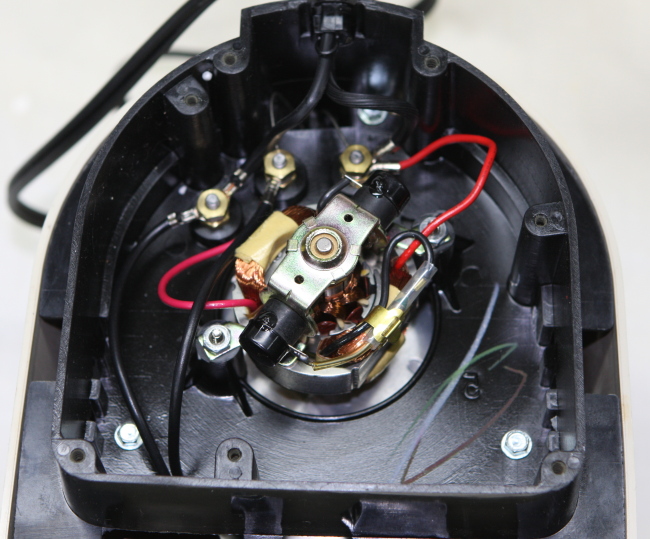
We can represent this as a simple schematic diagram:
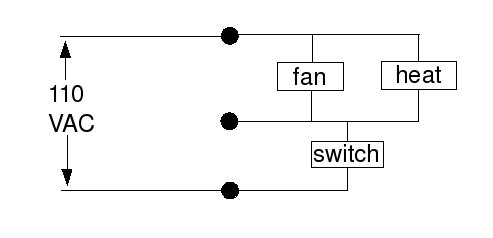
When viewed as in the photo above, the two outer terminals are used for
the power
connections. The center and right terminals are common connections for
the fan and
heating element. The switch is connected across the center and left
terminals.
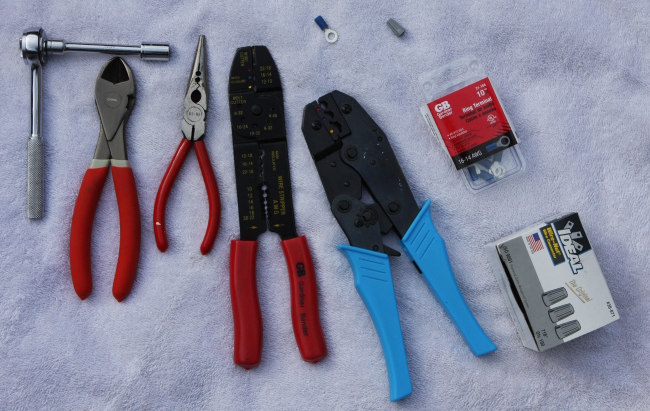
The tools needed for this project are minimal. Besides an electric hand
drill and
a set of bits I used an 11/32 socket to remove the the top nuts from
each terminal.
I used a ratching style crimper but the simpler style combined with a
wire stripper
will work.
I used the existing black cord to power only the heating element. A new
white cord was
introduced to power the fan. The fan draws very little current so a 16
gauge cord is
fine. I bought a short cord and cut it to match the length of the
original cord.
The next step was to drill a hole for the new power cord. Start with a
small bit and work
your way up to avoid breaking the somewhat brittle plastic. Locate the
hold a small
distance from the hold for the original power cord as illustrated here:
Be sure to feed the new power cord through the hole before proceeding.
Note that the wires
to the power switch have been cut and removed in the photo above. The
next step was to crimp
a ring terminal to one of the wires on the new power cord. The photo
below shows that the
terminal on the left is used for one of the fan connections. We lack a
fourth terminal for the
other fan connection so a wire nut is used. The wire for the fan is
quite small. I used a small
wire nut and soldered the fan wire to the new cord before attaching the
wire nut as I was not
confident of a good joint with just the wire nut.
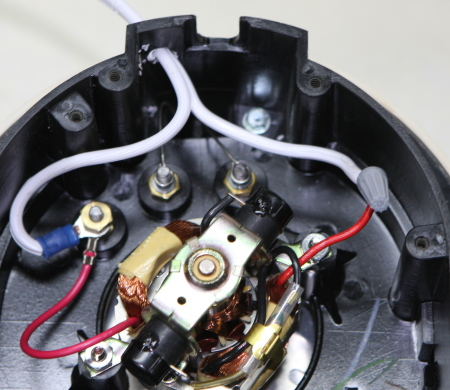
This next photo shows the completed wiring. I have used some hot melt
glue to tack the wire
nut against the side of the base to keep it out of the way. I also used
hot melt glue to secure
the new cord in place. It is important to make sure that the new power
cord cannot be
pulled out.
Reassemble the metal inner plate and the bottom of the unit. Then drill
a hole in the side to allow
inserting a thermometer. You need to enter at a steep angle in order to
get the tip of the
thermometer down into the center of the air chamber.
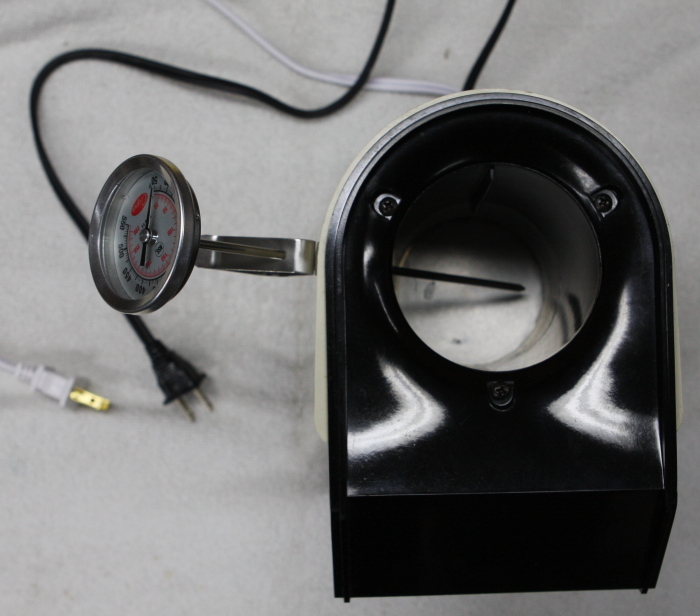
That completes the modification. You can extend the top of the chamber
with a suitable
metal can. I had some sheet aluminum handy and used that when the rest
of the
construction was completed as I could not find a suitable sized empty
can.
The completed unit looks like this:

Disclaimer: I am showing you what I did. This worked for me. This
certainly voids the
warranty on your popcorn popper. Working with household voltage may be
harmful.
If this looks difficult you should most certainly not attempt it. And
need I say that
you should not expect me to be responsible for your experience with
such a project?